
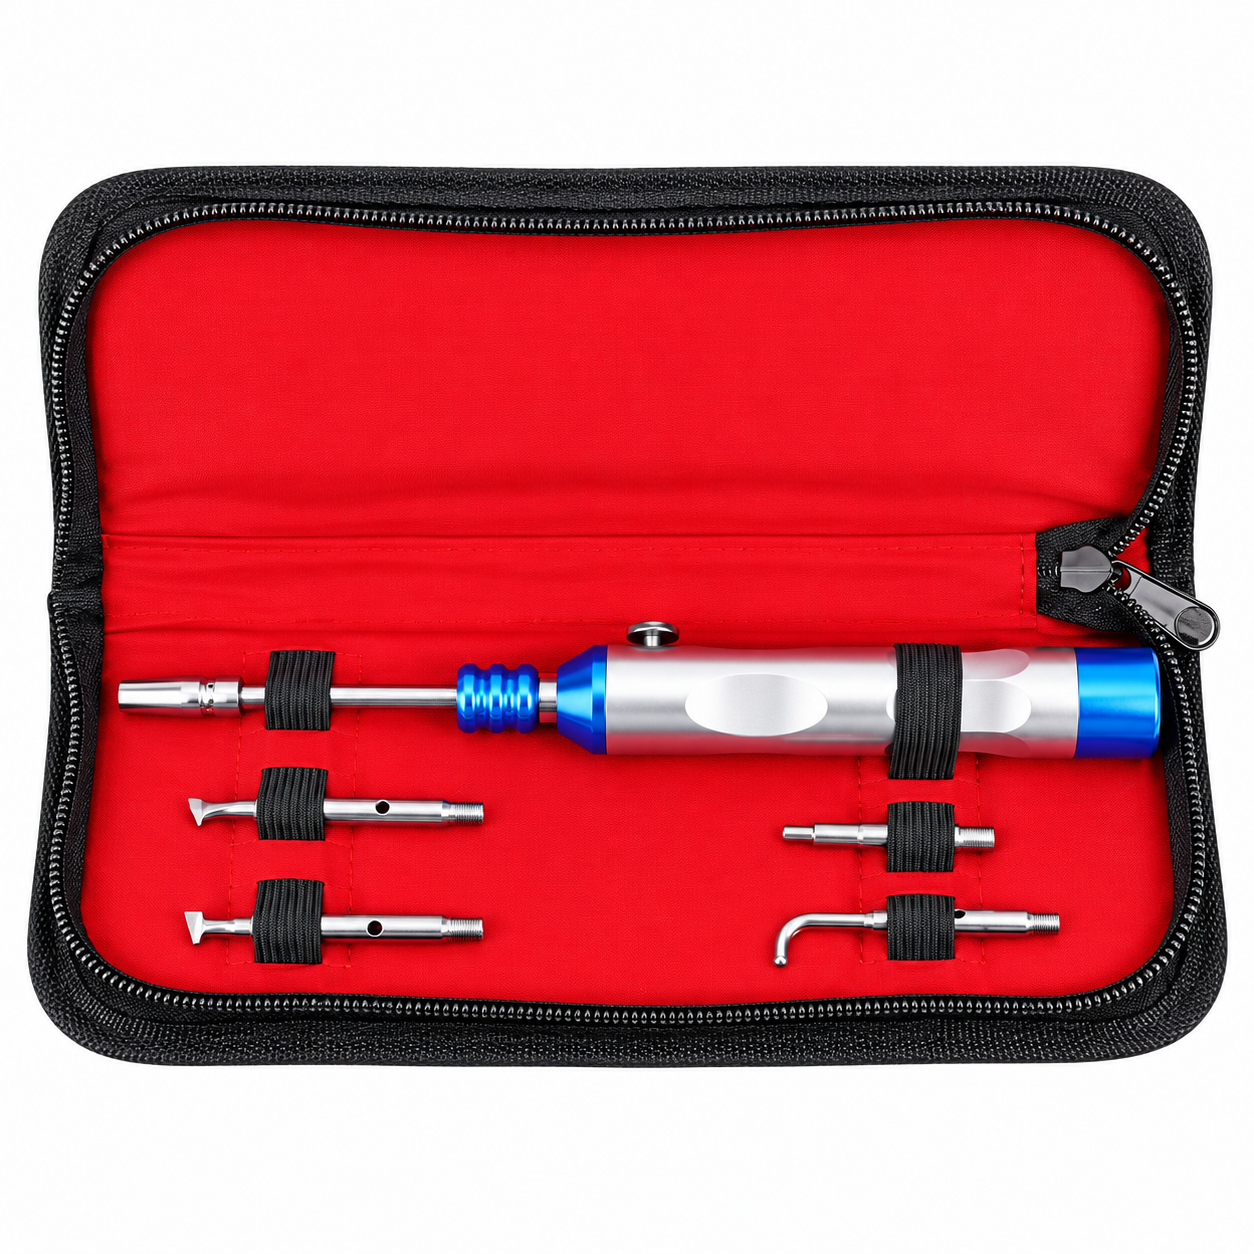
Precision Automatic Spring-Loaded Crown & Bridge Remover System
Removing cemented crowns, fixed partial dentures, and temporary restorations without damaging underlying abutment preparations is a common clinical challenge. Our Automatic Dental Crown & Bridge Remover Kit delivers calibrated mechanical impulse force at the touch of a button, fracturing the luting cement bond cleanly while safeguarding abutment tooth structure and minimizing patient anxiety[cite: 42, 43].
Key Clinical Advantages & Features
- One-Touch Spring Impulse Action: Internal calibrated spring system stores energy until the clinician depresses the lateral trigger button, releasing a predictable, instantaneous micro-shockwave that dislocates stubborn crowns smoothly[cite: 43].
- Significantly Reduced Patient Trauma: Unlike manual sliding hammers that generate violent axial pull and neck shock, the single-handed impulse mechanism eliminates excessive traction on the periodontal ligament[cite: 43].
- 4 Precision Screw-In Attachments:
- Straight Flat Chisel: Ideal for engaging anterior buccal margins and splitting vertical crown slots.
- Angled Flat Chisel: Fits interproximal margins and premolar cervical lines.
- Curved L-Hook Tip: Hooks underneath posterior bridge pontics and lingual margins.
- Tapered Pin Driver: Engages occlusal pilot holes and access points for direct axial elevation.
- Ergonomic Anodized Aluminum & Steel Handle: Features dual finger indents for firm tactile balance, preventing slip during wet chairside operating conditions[cite: 42, 43].
- 134°C Steam Autoclavable: Constructed from medical-grade surgical stainless steel, ensuring zero corrosion, tarnishing, or internal spring fatigue through repeated hospital autoclave cycles[cite: 43].
- Dedicated Protective Zipper Case: Padded red shock-resistant pouch with elastic retention bands keeps the handpiece and threaded tips organized, preventing tip blunting during transit and storage[cite: 42].
Technical Specifications
| Device Category | Automatic Crown and Bridge Removal Instrument[cite: 42, 43] |
| Operating Mechanism | Mechanical Spring-Loaded Automatic Impulse[cite: 43] |
| Raw Material | Surgical Stainless Steel & Anodized Aircraft Alloy[cite: 43] |
| Tip Attachments | 4 Interchangeable Threaded Working Ends (Chisels & Hooks)[cite: 42, 43] |
| Handle Diameter | Approx. 18 mm (Ergonomic contoured profile)[cite: 42] |
| Sterilization | Autoclavable at 134°C / 273°F (Handpiece & all tips) |
| Standard Packaging | Form-fitted black/red zippered storage pouch[cite: 42] |
| Quality Certifications | CE Marked & ISO 13485 Compliant |
Step-by-Step Clinical Protocol
- Select and screw the appropriate tip firmly into the handpiece nose cone[cite: 42].
- Engage the tip beneath the cervical margin of the crown or into a previously prepared buccal slot[cite: 42].
- Ensure axial alignment parallel to the insertion path of the abutment preparation.
- Depress the release button to trigger the impulse; repeat once or twice if necessary until cement adhesion yields[cite: 43].
Reviews
There are no reviews yet.